Microscopy Image Browser Graphcut segmentation
This window give access to semi-automated image segmentation using the maxflow/mincut graphcut method.
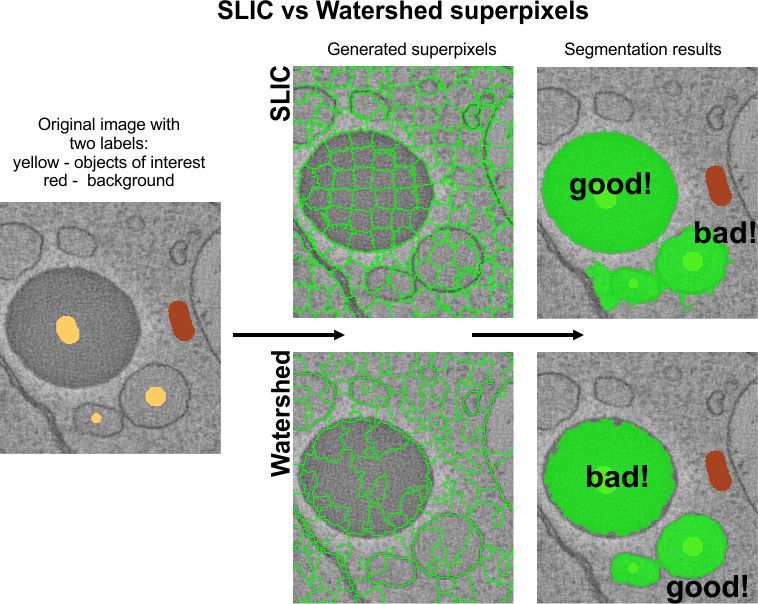
The Graph cut segmentation is based on Max-flow/min-cut algorithm written by Yuri Boykov and Vladimir Kolmogorov and implemented for MATLAB by Michael Rubinstein. The max-flow/min-cut algorithm is applied not to individual pixels but to groups of pixels (superpixels (2D), or supervoxels(3D)) that may be generated either using the SLIC algorithm written by Radhakrishna Achanta, Appu Shaji, Kevin Smith, Aurelien Lucchi, Pascal Fua, and Sabine S?sstrunk or by the Waterhed algorithm. The objects that have intensity contrast are best described with the SLIC superpixels, while the objects that have distinct boundaries with the Watershed superpixels. Utilization of superpixels requires some time to calculate them but pays off during the following segmentation.
Back to Index --> User Guide --> Menu --> Tools Menu
Contents
-
General example -
Mode panel -
Subarea panel -
Calculation of superpixels/supervoxels -
Image segmentation settings -
Image segmentation example -
References
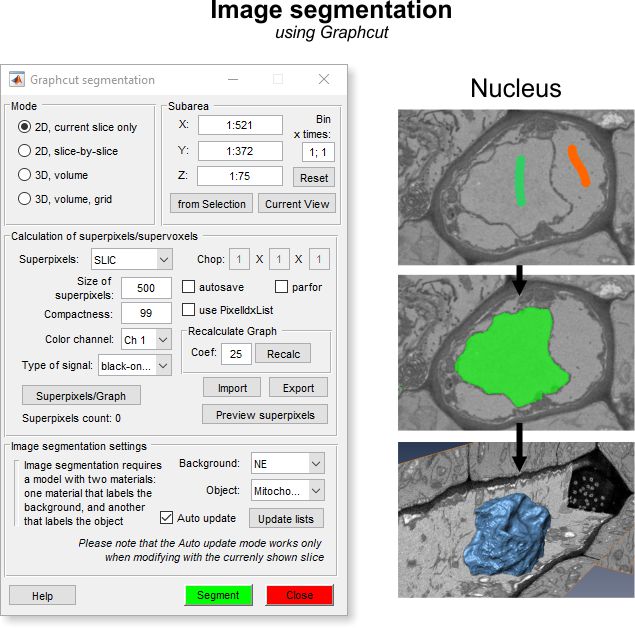
General example
A demonstration of the Graphcut segmentation is available in the following video:

https://youtu.be/dMeoIZPaDS4
How to use
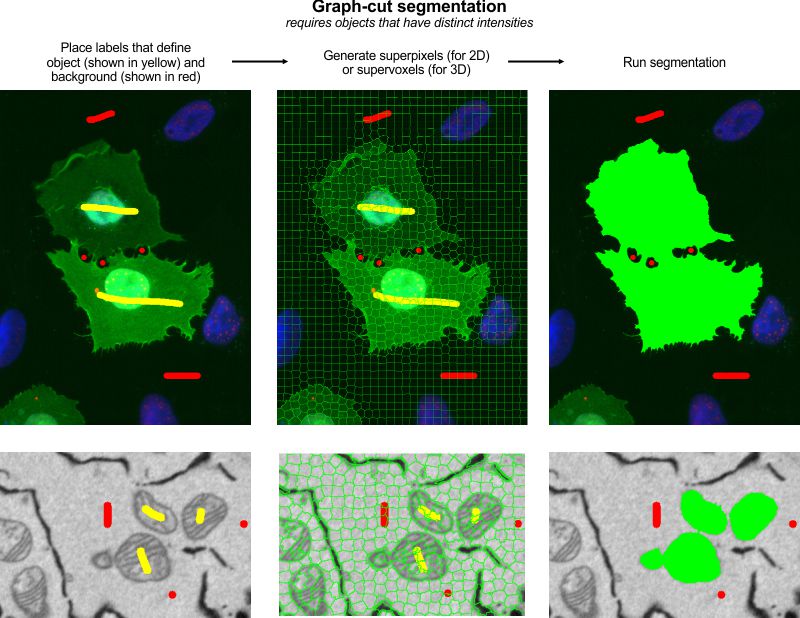
How to use:
- Use two labels to mark areas that belong to background and the objects of interest
- Start the Graphcut segmentation tool: Menu->Tools->Semi-automatic segmentation Graphcut
- Set one of the modes: 2D/3D
- Define type of superpixels/supervoxels: SLIC, or Watershed
- Generate superpixels/supervoxels (Press the Superpixels/Graph button)
- Check the size of the generated superpixels and modify the size if needed
- Press the Segment button to start segmentation
Note! some functions have to be compiled, please check the System Requirements page for details.
Mode panel
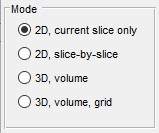
The Mode panel offers possibility to select a desired working mode for the segmentation.
|
|
Subarea panel
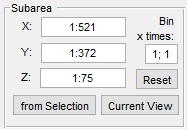
The Subarea panel allows selection of the sub-area of the dataset for processing. If dataset is too big it can be processed in parts or binned using this panel.
|
|
Calculation of superpixels/supervoxels
Before the segmentation, the pixels of the opened dataset should be clustered using the SLIC or Watershed algorithms. The picture below shows comparison between two types of superpixels. The upper panels show the SLIC superpixels that were good to segment a dark lipid droplet that has a good intensity contrast. The Watershed superpixels gave better segmentation of objects that were surrounded with boundaries.
Image example of clusters
![]()
- Superpixels ▼, define type of superpixels to use
- Size of superpixels..., defines approximate size of superpixels (SLIC only)
- Compactness..., a number between 1 and 99 that defines how square the superpixels should be; for example, 99 - results in quite square superpixels (SLIC only)
- Reduce number of superpixels..., a factor that is allowing to increase size of superpixels, the larger numbers results in larger superpixels (Watershed only)
- Color channel ▼, index of the color channel to be used for calculation of superpixels
- Type of signal ▼, use black-on-white for electron microscopy and light-on black for light microscopy
- The Chop...editboxes, allow to chop the dataset into smaller subvolumes for the ◉ 3D volume grid mode or for calculation of the SLIC supervoxels
- The [✓] autosave checkbox - when enabled, the resulting graphcut structure with the generated supervoxels is automatically saved to disk for future use
- The [✓] parfor checkbox - when enabled, the Watershed clustering for the 3D volume grid mode is calculated using the parallel processing, which improves calculation performance in several times
- [✓] use PixelIdsList - when enabled, the generation of final models is based on detected indices of supervoxels. This mode may improve performance in some situations, but requires more memory % Recalculate Graph - allows to recalculate the graph using a new coefficient (
Coef). In general, the larger coefficients give stronger growth from the seeds. Sometimes, however, the large coefficients results in segmentation of areas that are distant from the seeds, which is considered as an artefact of the method. - Superpixels/Graph press this button to initiate generation of superpixels and their final organization into a graph
- Import press to import superpixels and the generated graph from a disk or MATLAB
- Export press to export superpixels and the generated graph to a file, MATLAB, a new model or as Lines3D graph object (not recommended for many superpixels, see also here https://youtu.be/xrsTVqD7kOQ)
- Preview superpixels the generated superpixels may be previewed by pressing this button
Image segmentation settings
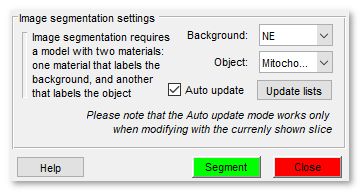
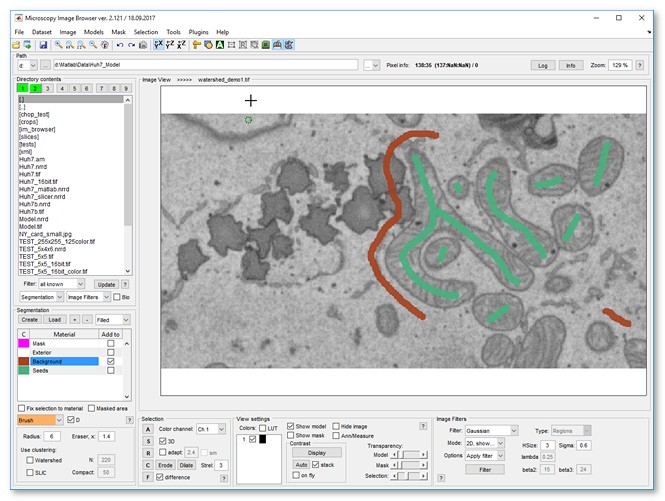
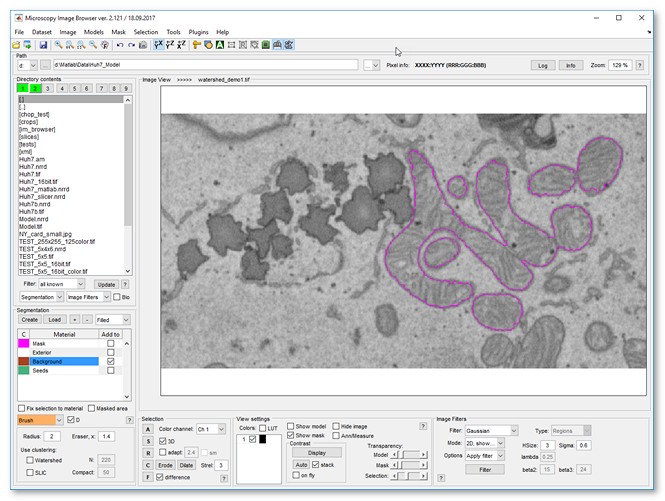
Both the Watershed and Graphcut workflows use provided labels that mark areas belonging to the Object and Background to perform the fine segmentation. Comparing to the Graphcut workflow, the Watershed workflow is a bit less interactive; it requires more time for the each execution and separates only objects that have distinct boundaries, for example membrane enclosed organelles.
On the other hand, the Graphcut workflow spends more time on the image preprocessing (calculation of the superpixels and generation of a graph) but each following interaction is fast. Using this workflow it is possible to separate objects that have both boundaries and intensity contrast. In general the Graphcut workflow is recommended for most of the cases.
Below, description of the Image segmentation settings:
|
|
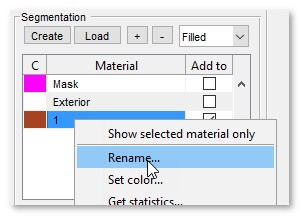
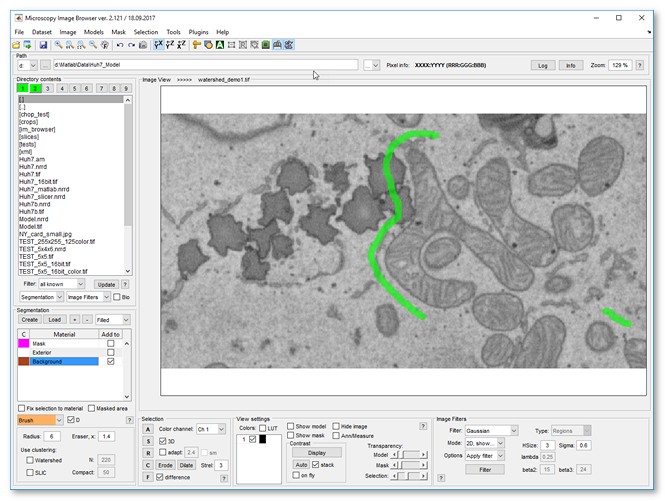
Image segmentation example
|
|
| |
| |
| |
| |
| |
References
Graph Cut:
- Max-flow/min-cut algorithm written by Yuri Boykov and Vladimir Kolmogorov (Please note that this algorithm is licensed only for research purposes).
- MATLAB wrapper for maxflow is written by Michael Rubinstein.
- SLIC superpixels and supervoxels by Radhakrishna Achanta, Appu Shaji, Kevin Smith, Aurelien Lucchi, Pascal Fua, and Sabine S?sstrunk.
- Region Adjacency Graph (RAG) and its modification for watershed was written by David Legland, INRA, France, 2013-2015 and was used in calculation of adjusent superpixels
Back to Index --> User Guide --> Menu --> Tools Menu
 ). Chopping of large volume into several small subvolumes (e.g.400x400x400 pixels allows effective interactive segmentation of this large volume
To segment all subvolumes press the