Image View Panel
Back to MIB | User Guide | Panels
Overview
The Image View Panel displays slices of the opened dataset, allowing you to visualize your images in
XY, ZX, or ZY orientations. The orientation is selected via
the Toolbar.
On the left side, a slider and edit box let you navigate through slices—though these are
hidden for single-slice datasets.
Image layers in MIB
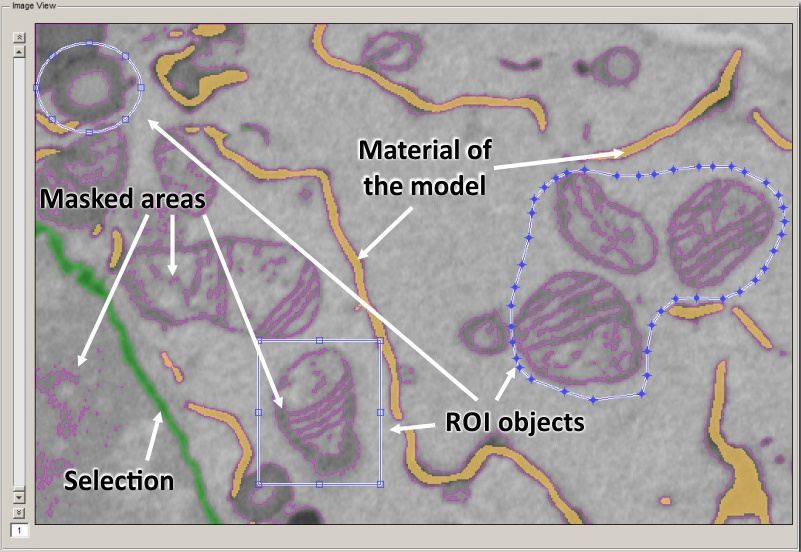
The Image View Panel can simultaneously display multiple layers, each serving a distinct purpose:
- Grayscale or multichannel image: Shows the original image being analyzed, in grayscale or multichannel format.
- Model layer: Displays segmented model materials or a difference map for correlation analysis. See Data Layers for details.
- Mask layer: A black-and-white (bitmap) mask generated by filters, used as a source for shapes in segmentation or for local black-and-white thresholding with the BW Thresholding tool.
- Selection layer: A temporary layer for segmentation, easily modified before transferring to the Mask or Model layers.
- ROI layer: Shows Regions of Interest (ROIs) when enabled, allowing focused selection and analysis within the image.

You can adjust the colors and transparency of the Model, Mask, and Selection layers using sliders in the View Settings panel or the Menu -> File -> Preferences -> Colors and styles (Menu -> File -> Preferences -> Colors).
Mouse actions
Interact with the image using these mouse actions:
- Move mouse: hover to see pixel information and coordinates in the Path Panel.
: to select pixels based on the method chosen in the Segmentation Panel. + move mouse: right-click and drag to pan the image left/right or up/down. - Ctrl +
: erase from the current selection. - Ctrl + mouse wheel (or Ctrl + Shift + mouse wheel): adjust the size of the brush or other selection tools.
- Mouse wheel: Scroll to change slices or zoom in/out, depending on settings in the Preferences dialog.
- Shift + mouse wheel: Jump 10 slices at a time (customizable via right-click on the slice slider).
Modification of GUI depending on configuration of these checkboxes

Key actions
Navigate and manipulate the image with these shortcuts:
- W: zoom in to the area under the cursor.
- Q: zoom out from the area under the cursor.
- Mouse wheel: show next/previous slice.
- Shift + mouse wheel: jump 10 slices forward/back (adjustable via slider context menu).
- Up: show next slice.
- Down: show previous slice.
- Right: show next time point.
- Left: show previous time point.
Customize shortcuts in Menu -> File -> Preferences -> Keyboard shortcuts.
See the full list in Key and Mouse Shortcuts.
Drag and drop files
Load files directly into the Image View Panel by dragging and dropping:
- Images: Drag image files from a file explorer to load them.
- Models: Drop files with a
.modelextension to load as a new model. For labeled models with other extensions, drop them onto the Segmentation table in the Segmentation Panel. - Masks: Drag
.maskfiles to load them automatically. - Annotations: Drop
.ann<files to load annotations instantly.
Extra parameters for the slice slider
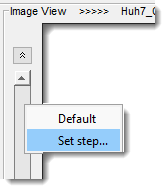
The slice slider appears only for 3D or 4D datasets. By default, the mouse wheel changes slices by 1.
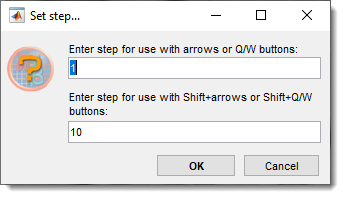
the slider. - Choose your desired step from the context menu.
Back to MIB | User Guide | Panels